Back to Blog

How To Integrate Salesforce With LinkedIn

Image of Jonathan Elder
Jonathan Elder

Why should you integrate Salesforce with LinkedIn?

Is your sales team engaging with target accounts and leads on LinkedIn using personalised outreaches? Personalised outreach and social selling have proven to be more effective than general templated approaches.

However, personalisation at scale takes time. Much of the research behind these outreaches will come from your sales team spending hours in Sales Navigator. Therefore it only makes sense to synchronise your Salesforce CRM with Sales Navigator, right?

Integrating LinkedIn and Salesforce allows your sales team to utilise the combined power of LinkedIn Sales Navigator, where they’re currently researching prospects and building Lead/Account Lists, and your Salesforce CRM.

Salesforce offers a solution on the AppExchange, Sales Navigator by LinkedIn. This app enables you to automatically import lead records, contacts, and accounts from Sales Navigator into Salesforce.

Sales Navigator by LinkedIn

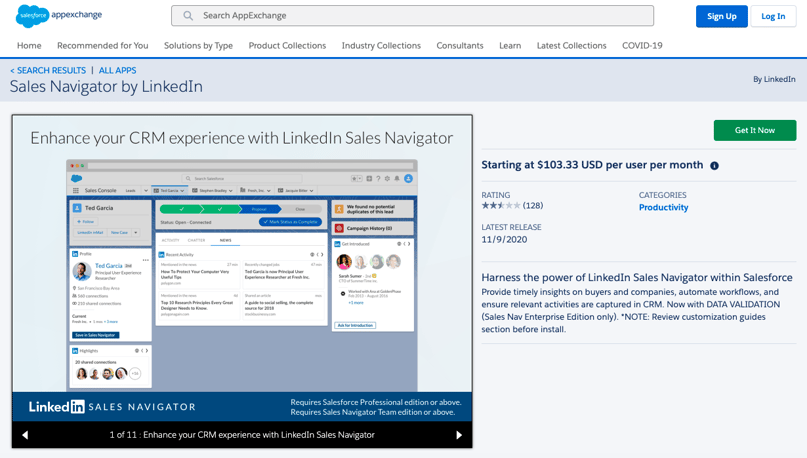
Integrating LinkedIn and Salesforce allows your team to see sales activity all in one place, without having to leave Salesforce. Your team can spend less time jumping between platforms and more time engaging with leads.

Sales Navigator by LinkedIn can be displayed on the account, contact, and lead objects in Salesforce, either through a lightning component or a visual force page on page layouts.

Syncing up LinkedIn and Salesforce:

  • Profile: Automatically see contact/lead and account information.
  • Highlights: Information about shared connections.
  • Recent Activities: Stay up-to-date on events impacting your accounts.
  • Get Introduced: Discover how to engage leads or contacts via your connections or TeamLink.
  • Recommended Leads: Target the right person or buyer committee within a chosen account.


How to integrate Salesforce with LinkedIn / Step-By-Step Installation Guide


Prerequisites

To ensure a successful installation, please check the following criteria:

  • You must have Administrator rights for Salesforce: Enterprise, Performance, Unlimited, or Developer edition
  • You must be a LinkedIn Sales Navigator Team or Enterprise Edition customer. 
  • Javascript enabled browser is required to install and configure Sales Navigator.


Enabling Your Salesforce Domain

Before you install you will need to set up your domain in Salesforce.

To set up your domain:

  1. Navigate to your Salesforce homepage.
  2. Click Setup and type My Domain in the Quick Find search box.
  3. Under Company Settings, select My Domain
  4. Type your chosen domain name under Choose Your Domain Name and Check Availability.
  5. Click Register Domain if your chosen name is available.
  6. You will need to Log in to test your domain. An email from support@salesforce.com will be sent to your inbox. Click the link in this email to log in and test your new domain.
  7. A Navigate to this page pop-up window will appear, click Open.
  8. When you’ve finished your testing, return to My Domain settings and select Deploy to Users.
  9. In the pop-up box that appears, click OK

Notes:

  • You’ll need to wait for your domain to be published, you’ll also receive an email to your registered email id.
  • Your domain setting can be edited at a later date.


Installation

To install the LinkedIn Sales Navigator app:

  1. In the Quick Find search box type LinkedIn Sales Navigator.
  2. Under Feature Settings select LinkedIn Sales Navigator and click Install.
  3. Click Get it Now in the pop-up window that appears. AppExchange login may be required for verification purposes.
  4. You’ll be presented with two options Install in This org and Install in a Sandbox org, depending on your desired destination click Install Here or Install in Sandbox.
  5. Click Confirm and Install after reviewing and agreeing to the terms and conditions.
  6. You’ll now be presented with three options: Install for Admins Only, Install for All Users and Install for Specific Profiles. If you don’t wish to limit any users, select Install for All Users.
  7. Click Install.
  8. You’ll see one of two screens:
    1. Installation Complete
    2. Processing (You’ll receive an email after the installation is complete)


Configuration

Manage LinkedIn Tasks by Users

Once installed, you need to manage users in your Salesforce account and enable LinkedIn tasks only for the relevant users.

Enabling tasks for users:

  1. Type Profiles in the Quick Find search box.
  2. Under Manage Users select Profiles.
  3. Select the first profile in the list
  4. Scroll down to Record Type Settings.
  5. Locate Tasks and click Edit.
  6. Select LinkedIn Call, LinkedIn InMail, LinkedIn Message, Smart Links Created, Smart Links Viewed, and click the Remove button for each.
  7. Save.
  8. Repeat Steps 3 to 7 for all relevant profiles.

Notes:

  • Don’t click System Admin or Integration User’s Profile.
  • Don’t change the System Admin or Integration User’s Profile.


Give Users Access to LinkedIn Reports Folder

To give users access:

  1. Click App Launcher in the top left corner and select Marketing.
  2. Select the Reports.
  3. Select All folders.
  4. Locate the LinkedIn Reports folder and click the dropdown icon.
  5. Select Share.
  6. Select users and determine their access based on your organisation’s current security protocol.
  7. Select Done.


Configure LinkedIn Sales Navigator App in Salesforce

Customise Page Layouts:

  1. From the Contacts Record, select Setup > Edit Page
  2. Under Lightning Components, search Sales Navigator 
  3. Click Sales Navigator: Member Profile (LID) box, drag to desired section and then release.
  4. Adjust the embedded profile settings to show one or multiple elements and click Save.
  5. As a Salesforce admin, you'll also Activate the new layout for all relevant users. 
  6. Repeat steps 2 to 4, to add the Sales Navigator: Member Profile (LID) to additional sections of the page or other page layouts.
  7. When you are satisfied with the changes made, click Save before again activating for selected users.
  8. Repeat steps 1 to 6, for Leads, Accounts and Opportunities Page Layouts.


Enable InMail Quick Actions:

  1. Click Setup and select Object Manager.
  2. From Object Manager, select Contact > Page Layouts.
  3. From Page Layouts, select Contact Layout > Mobile & Lightning Actions.
  4. Select LinkedIn InMail, drag and drop into the Salesforce Mobile and Lightning Experience Actions section.
  5. Click Save.
  6. Return to Object Manager and repeat steps 2 to 5 for Lead Page Layouts.

Notes: 

  • You should see a green checkmark after step 4 to confirm that this change has been accepted.
  • If your team does not have access to LinkedIn Sales Navigator Teams or Enterprise edition the LinkedIn InMail will not be visible on Salesforce.


Post Installation CRM Sync

After completing all of the steps above, you can move forward with enabling the CRM Sync from within the Sales Navigator Admin settings. CRM Sync expands the integration and supports direct linking between LinkedIn and Salesforce.

Connect Salesforce with LinkedIn

You can find further information from LinkedIn here: Sales Navigator CRM Sync & Activity Writeback for Salesforce.


Additional Notes

Restoring Global Actions via LinkedIn Admin Portal

Installing the LinkedIn Sales Navigator app within Salesforce will create new Custom Record Types for Tasks, potentially hiding certain Global Actions/Tasks. This will occur if you have not used Task Record Types previously.

To resolve this, follow steps in the Sales Navigator Installation Wizard. This can be accessed via the LinkedIn Admin Portal. This should automatically create a general Custom Record Type and assign it for the Global Actions/Task that are hidden. This should resolve the issue.

  1. Click the tile icon on the top left corner of your screen and type LinkedIn Admin Portal
  2. Select the LinkedIn Admin Portal 
  3. Select Sales Navigator Installation Wizard to navigate through the process for restoring Global Actions/Tasks.


Salesflags 

If you are looking to personalise your outreach at scale, speak to us about how we can enable your Salesforce CRM system to go beyond the LinkedIn's Sales Navigator integration.

Freeflags allows you to perform lead generation and social selling. Freeflags provides sales intelligence, specifically syncing social activity from LinkedIn Company Pages into your Salesforce contact records. Freeflags creates new leads from this data with links directly back to LinkedIn and suggests social selling activities to follow up.

Proflags supports all that is in Freeflags, plus sales enablement functionality that syncs LinkedIn Ads and engagement from personal activity, with your Salesforce records. Proflags' sales acceleration features include customisable lead scoring, sales coaching workflows, the tracking of actual follow-up social selling activity and management reporting.


Related Posts

Salesforce’s New Native Sales Navigator Integration For LinkedIn

Image of Jonathan Elder
Jonathan Elder

Are your sales team connecting with prospects and communicating with customers via LinkedIn Sales...

Read more

LinkedIn sales and data intelligence options for Sales Operations

Image of Jonathan Elder
Jonathan Elder

What are the best LinkedIn sales and data intelligence options for your Sales Operations?Many Sales...

Read more