Proflags Quickstart Guide (Enterprise Edition)
Note: Please ensure that you have System Administrator permissions in order to use this guide. Please ensure one of your Users have administration access to your Company LinkedIn Page that you wish Salesflags to collect data from.
SALESFORCE ADMINISTRATOR
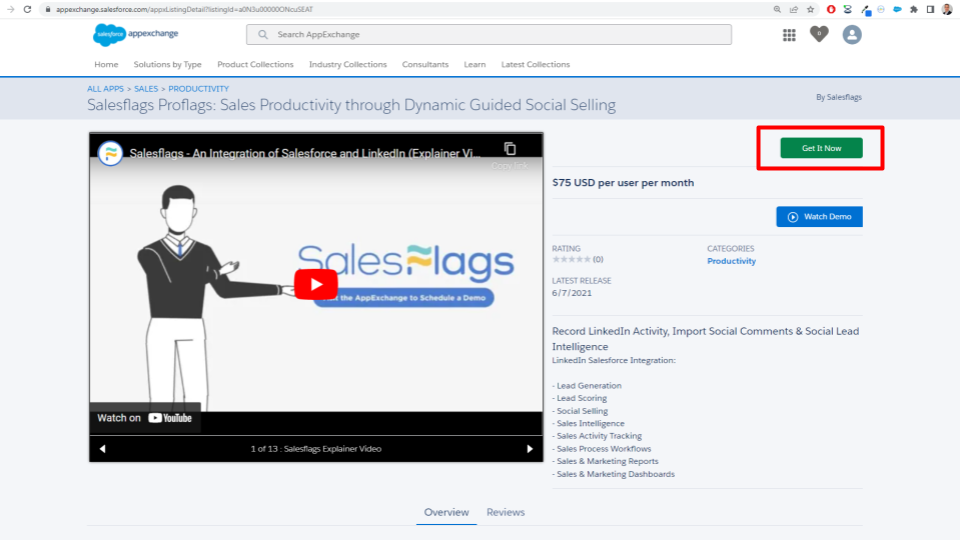
1. Download the Proflags App
https://login.salesforce.com/packaging/installPackage.apexp?p0=04t4K000001PraC
Install for All Users.

.png)
2. Link to the LinkedIn API
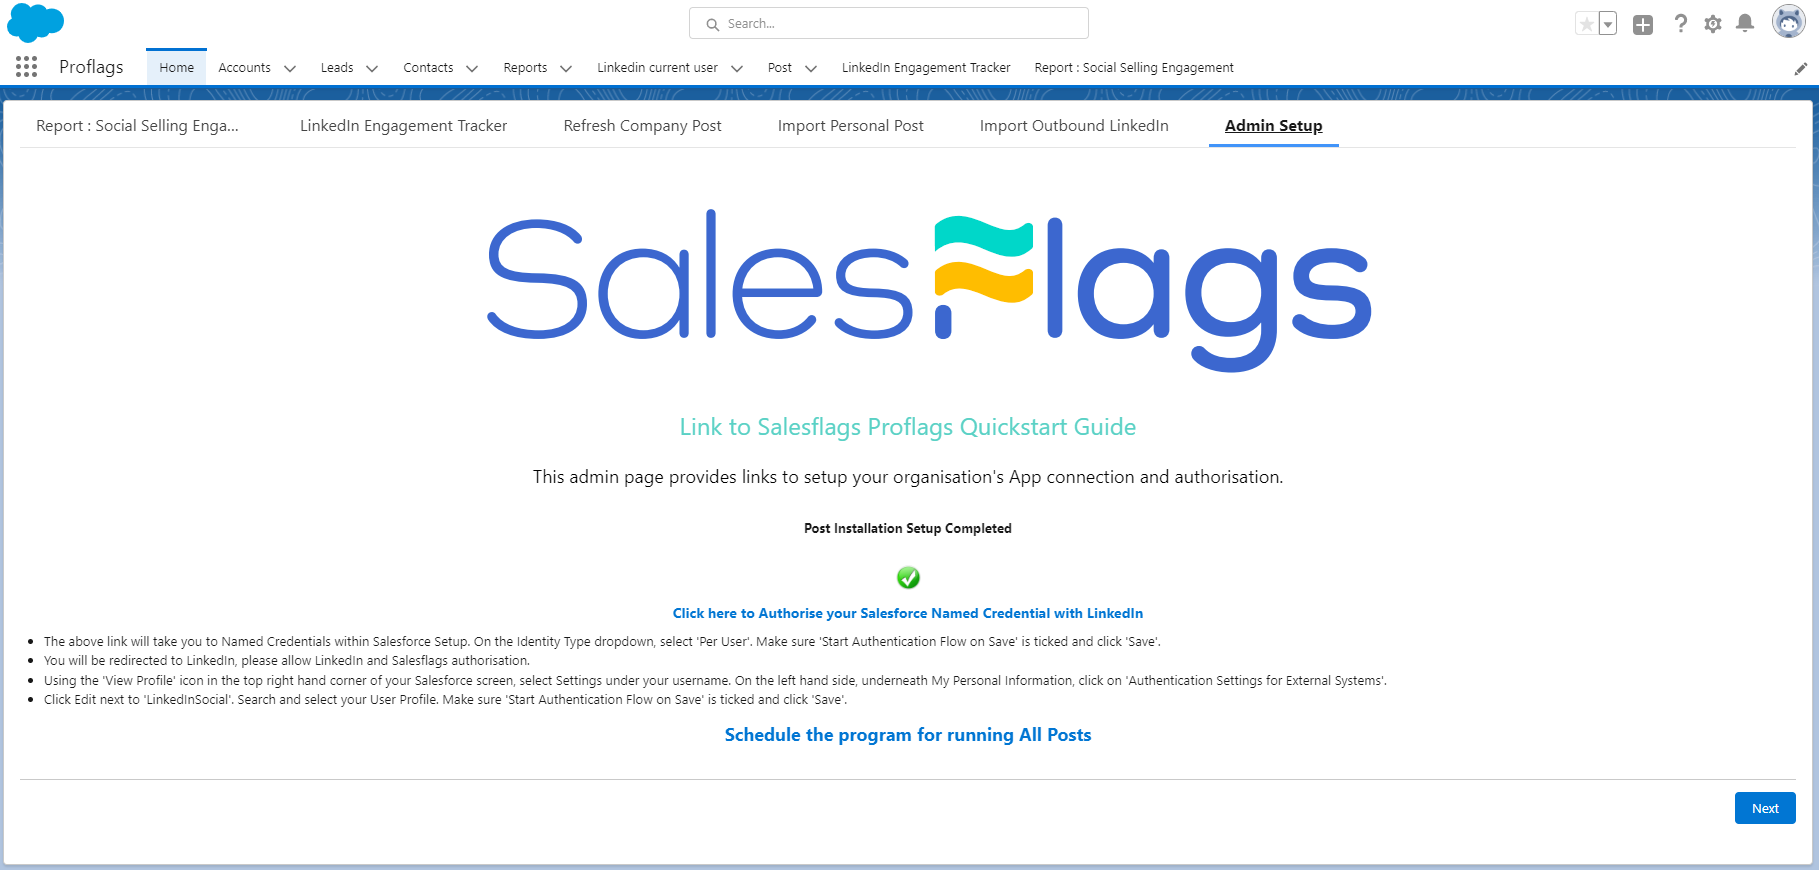
To set up the connection to the LinkedIn API for your LinkedIn Company Page, navigate to the App Launcher in the top left hand side of your screen. Search and select the Proflags App, then click 'Admin Setup' on the far right hand side tab of the Salesflags Proflags window.
Underneath 'Start Post Installation Setup', on the right hand side click 'Next' and tick ‘Click here to send Callback URL to Salesflags to kick off App'. Click 'Next' again to complete the flow.
It may take Salesflags up to 24 hours to set your connection with your Callback URL.
Salesflags will confirm by email when the connection is ready for you to complete the next step; authentication.
.png)
.png)
.png)
.png)
.png)
3. Set LinkedIn Authorization to Per User
Go to Salesforce Setup and search for Named Credentials in the Quick Find box.
Click Edit next to LinkedInSocial from the available options.
On the Identity Type dropdown, select 'Per User'. Ensure that the 'Start Authentication Flow on Save' box is unticked.
Click 'Save'.
.png)
.png)
4. Authorize User Profiles to Access LinkedIn
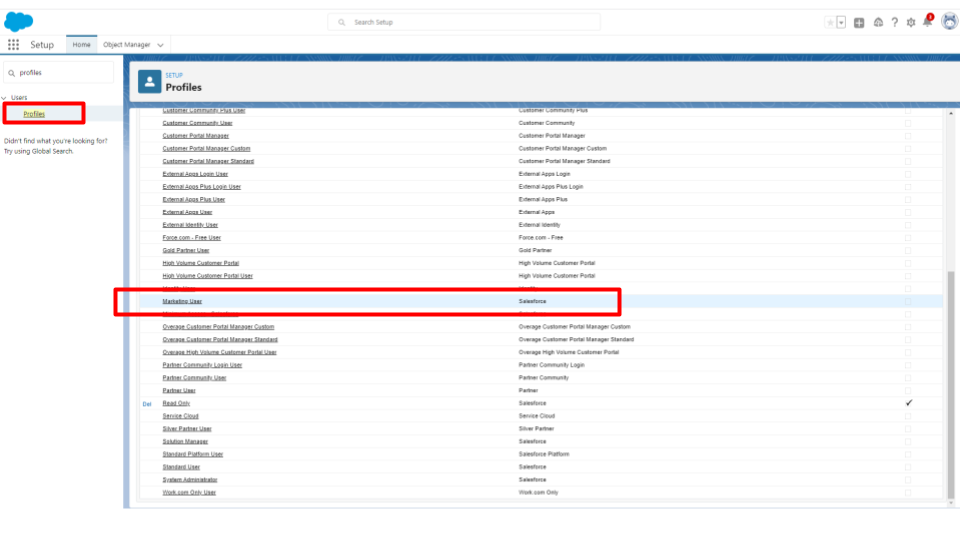
Search for 'Profiles' in the Quick Find box.
Select the Profile that your LinkedIn Company Page administrator uses in Salesforce e.g Standard Marketing User.
Under the 'Apps' section, select 'Named Credential Access'.
Click 'Edit' and move 'Proflags: LinkedIn Social' from Available Named Credentials into Enabled Named Credentials.
Click 'Save' and return to the Profile Overview page.
Repeat this step for all Sales User Profiles that will be using Salesflags for Personal Posts.

.png)
.png)
5a. Edit Profile Permissions for LinkedIn Company Page Administrators to use Salesflags
We recommend working on Profiles that are editable (non standard)
Under the 'Apps' section, select 'Object Settings'. On the All Object Settings list:
Click on 'Auth Provider Info' and click 'Edit'.
Under Object Permissions, enable: Read, Create, Edit and Delete.
Click 'Save' and return to All Object Settings List.
Click on 'LinkedIn Current User' and click 'Edit'.
Under Object Permissions, enable: Read, Create, Edit and Delete.
Click 'Save' and return to All Object Settings List.
Click on 'Post' and click 'Edit'.
Under Object Permissions, enable: Read, Create, Edit and Delete.
Click 'Save' and return to All Object Settings List.
.png)
.png)
5b. Edit Profile Permissions for Sales Users to use Salesflags
Under the 'Apps' section, select 'Object Settings'. On the All Object Settings list:
Click on 'Auth Provider Info' and click 'Edit'.
Under Object Permissions, enable: Read, Create, Edit and Delete.
Click 'Save' and return to All Object Settings List.
Click on 'LinkedIn Current User' and click 'Edit'.
Under Object Permissions, enable: Read, Create, Edit and Delete.
Click 'Save' and return to All Object Settings List.
Click on 'Post' and click 'Edit'.
Under Object Permissions, enable: Read, Create, Edit and Delete.
Click 'Save' and return to All Object Settings List.
Click on 'Personal Post' and click 'Edit'.
Under Object Permissions, enable: Read, Create, Edit and Delete.
Click 'Save' and return to All Object Settings List.
Click on 'Salesperson Activities' and click 'Edit'.
Under Object Permissions, enable: Read, Create, Edit and Delete.
Click 'Save' and return to All Object Settings List.
6. Activate Flows - Per User
Search for 'Users' in the Quick Find box.
Press 'Edit' next to all potential Salesflags users.
In the 'General Information' section ensure that the 'Flow User' box is ticked.
Press 'Save'.
.png)
7. Format a Salesforce Account Page with a Field to store a LinkedIn Company Account ID
Using the cog icon in the top right hand corner of your Salesforce screen, select Setup. Navigate to the Object Manager tab on the top of your screen and search for 'Account' in the Quick Find box.
Select 'Page Layouts' on the left hand side and 'Account Layout' on the available options.
Using the Fields options, drag and place ‘LinkedIn Company Account ID’ into the Account Information section and press Save.
.png)
.png)
.png)
LINKEDIN COMPANY PAGE ADMINISTRATOR
8. Create an Account and to store your Company Page LinkedIn ID
Using the App Launcher in the top left hand side of your screen, search and select the Proflags App.
In the 'Accounts' tab, create a new Account and add your Salesflags Company LinkedIn ID, this can be found in the URL above your LinkedIn Company Page (example shown below)
.png)
.png)
.png)
9. Authorize Your LinkedIn Admin Named Credential
Using the 'View Profile' icon in the top right hand corner of your Salesforce screen, select Settings under your username. On the left hand side, underneath My Personal Information, click on 'Authentication Settings for External Systems'.
Click 'New'. Make sure 'Start Authentication Flow on Save' is ticked and click 'Save'.
.png)
.png)
.png)
.png)
.png)
.png?width=192&height=500&name=image%20(1).png)
.png)

10. Import all Company Page posts
Return to the Salesflags Proflags App Home page and select the 'Refresh Company Post' tab.
Click 'Next' underneath 'Get All Post' and click 'Next' again to start importing your LinkedIn Company Page posts and the Social Activity data, including comments and reactions.
Please allow up to one hour for all data to be imported. We recommend repeating this step twice a day, once in the morning and again in the late afternoon.
.png)
.png)
.png)
.png)
11. Sales User: Follow proposed Social Activities on a List of LinkedIn Company (Page Post) Comments
Click on the Salesforce Leads tab. From the dropdown, select the Leads list 'For LinkedIn Salesflags Engagement' view.
- Review
Looking at the Name, Company/Headline and, if necessary, use the LinkedIn Profile link to evaluate the Lead.
- Rate
Using the Rating field, initially qualify the Lead, based on your review.
- Engage
For Leads that have no Tracked Follow Up, use the Latest Comment Link to leave a reaction against the Lead's comment.
Note: The next time the data is imported via Refresh Company Post (Step 6), the Tracked Follow Up box will be checked.
.png)
.png)
.png)
.png)
12a. Sales Leader: Report on LinkedIn follow up over the last 3 weeks (before Salesflags)
Click on the Salesforce Reports tab, on the left hand side select All Reports and search for the report 'LinkedIn Follow Up - Last 3 Weeks'.
This report will show the total number of LinkedIn activities over the last 3 weeks that have been tracked for a Lead Owner.
.png)
.png)
12b. Sales Leader: Report on LinkedIn follow up over the last 3 weeks (using Salesflags)
Click on the Salesforce Reports tab, on the left hand side select All Reports and search for the report 'LinkedIn Follow Up - Last 3 Weeks'.
This report will show the total number of LinkedIn activities over the last 3 weeks that have been tracked for a Lead Owner.
Authorise your Salesforce Named Credential with LinkedIn
Click on the 'Click here to Authorise your Salesforce Named Credential with LinkedIn' text.
This link will take you to Named Credentials within Salesforce Setup. On the Identity Type dropdown, select 'Per User'. Make sure 'Start Authentication Flow on Save' is ticked and click 'Save'.
You will be redirected to LinkedIn, please allow LinkedIn and Salesflags authorisation.
Using the 'View Profile' icon in the top right hand corner of your Salesforce screen, select Settings under your username. On the left hand side, underneath My Personal Information, click on 'Authentication Settings for External Systems'.
Click Edit next to 'LinkedInSocial'. Search and select your User Profile. Make sure 'Start Authentication Flow on Save' is ticked and click 'Save'.
Want to discuss Social Selling?
If you're interested in social selling best practices for your sales team, please get in touch. We would be happy to discuss your situation and how we can help.
